HOW TO SET UP THE GLUTE BRIDGE
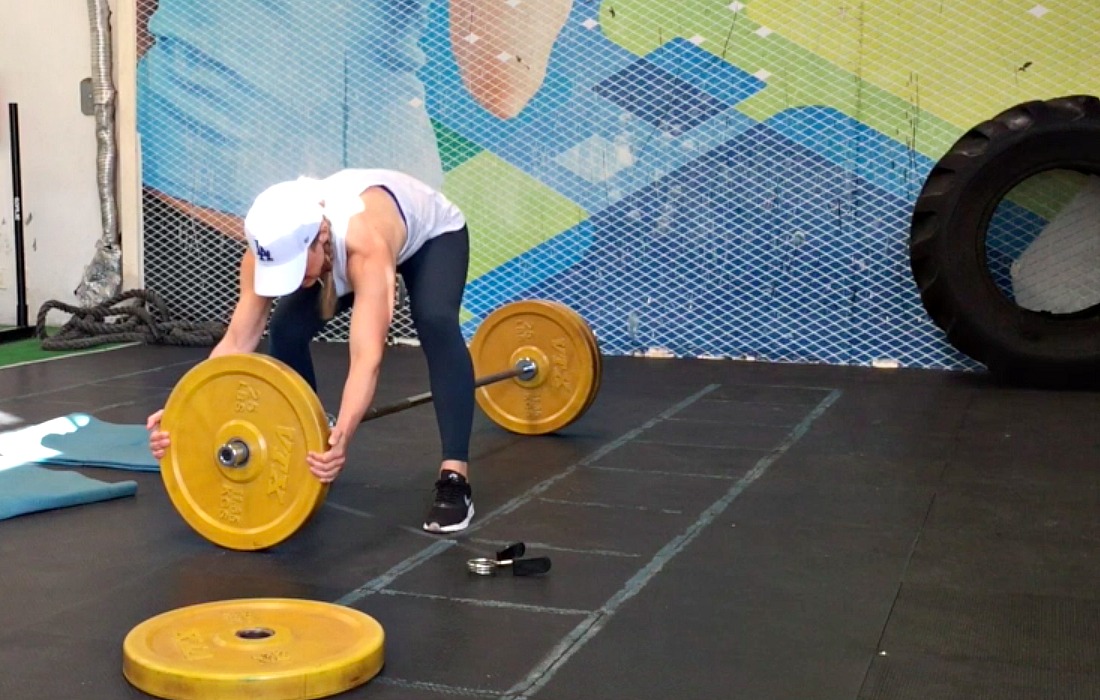
Don’t let the hassle of setting up your glute bridges stop you from doing this exercise which should be in every woman’s program! You’ll find some tips below for setting up the glute bridge as well as a video showing the entire set up (and taking apart of the weights – if you watch to the very end of the video you’ll see a cool way to save yourself from having to pull the weights off the bar). I’ve also included a few tips for “setting up” your body because there are some important things you should consider to prevent injury and make sure you feel your glutes working as much as possible.
1. Find a quiet space to set everything up.
TIP: I like to schedule glute bridges for days that are less busy at the gym (ie. Sunday mornings).
2. You’ll need:
- an Olympic bar
- weights
- collars for holding the weights on
- a mat for underneath you
- another mat for padding (unless your gym has a pad you can use)
3. Load the bar with weights and secure the weights with a collar on each side.
Look for the plastic collars with quick release as these are much easier to get on the bar than the steel ones. The steel collars are often very hard to squeeze open and they also don’t slide on the bar very well. (You can see me struggle with them in the video, especially when I’m trying to get them off.)
If your gym only has the steel ones, keep using them because your hand strength will develop and it will get (somewhat) easier to get them on and off.
4. Put a mat underneath you and fold one up for padding between your hips and the bar.
If your gym floor is hard you may need two mats underneath you. Folding a mat provides more padding than wrapping a mat around the bar.
TIP: The thinner the mat, the more folds you are going to need to make so that the padding is thicker.
HOW TO SET UP YOUR BODY FOR GLUTE BRIDGES
1. Position yourself under the bar.
Make sure your feet are on the floor rather than on the mat so you have a solid, non-slip foundation for your bridges. Put the folded mat on your hips and roll the bar carefully onto the mat (you want it to sit in the middle of the mat so it doesn’t roll off onto your hips when you start doing your bridges).
CLOTHING TIP: You may find that you slide backwards on the mat if you wear a slippery shirt (or even if you use a towel on the mat). Certain materials tend to slide less and this means much better control over your glute bridges, especially when you start lifting heavier. Keep this in mind when choosing what to wear on glute day!
2. Check your foot placement.
Position your feet about shoulder width apart. Many women feel their glutes better if they turn their toes out slightly wider than their heels.
TIP: If you feel your hamstrings more than your glutes, your feet may be too far from your hips (also try pointing your toes out slightly). If you feel your quads and/or knees, your feet may be too close to your body.
3. Brace your core.
Before you lift your hips, brace your core. Do this by taking a deep breath and creating a posterior tilt (flatten your lower back as opposed to having an arch in your back). Keep this position while doing your glute bridges – you should not perform glute bridges with an arch in your back.
4. Hold the bar in place.
While doing your bridges, hold the bar with a wide grip. It helps to push the bar towards your legs while doing bridges so it doesn’t roll down onto your hip bones and stomach. Think about pushing it away from your torso.
TIP: The heavier weight you lift, the more you may feel this in your wrists. I struggled with wrist pain on glute bridges for a long time. If you feel your wrists, try changing from an overhand grip to an underhand grip. You may also want to perform some wrist warm ups before your glute bridges.
FOR MORE ABOUT GLUTE BRIDGES, CHECK THESE ARTICLES OUT:
The Glute Bridge Guide: Variations and Progression
5 Unique Exercises For Gorgeous Glutes [With Videos]
The Best Way To Train Legs (Without Making Them Bigger)

